
You want to learn how to clean a surfboard because you understand that maintaining the cleanliness of your surfboard not only enhances its performance but also extends its lifespan, ensuring you can catch waves effectively for years to come.
Regular cleaning removes the accumulation of surfwax, sand, saltwater residue, and other contaminants that can degrade the board’s materials and affect your grip on the surface.

It’s a simple process that calls for a few household items and a bit of your time.
Removing old surfwax is a crucial step in the cleaning routine. The wax layer, which provides traction while surfing, tends to get dirty and lose its effectiveness over time. Refreshing this layer is necessary to maintain optimal performance. You’ll need specific tools to do this effectively, such as a wax comb for scraping and a cleaner to remove the wax residue.
When beginning the cleaning process, choose a well-ventilated area to work in, as some cleaning agents can emit strong fumes.
Using the right cleaning materials and techniques will not only ensure a thorough cleanse but will also prevent potential damage to your surfboard.
Remember to approach the task with care, focusing on preserving the board’s structural integrity as you restore its sleek, polished look.
Understanding Your Surfboard

Your surfboard is a complex piece of equipment, combining design sophistication with material science.
It is crucial to comprehend these factors for effective maintenance and to ensure peak functionality.
Material Basics
The primary material of your surfboard is the foam core, usually made from either polyurethane or expanded polystyrene (EPS).
Covering this core, there is a layer of fiberglass cloth and resin, which adds strength and durability to the structure.
Selection of materials directly affects the board’s performance and longevity, influencing factors such as buoyancy, weight, and responsiveness in the water.
- Polyurethane (PU): Heavier and more traditional, offers a flex pattern that’s preferred by many surfers.
- Expanded Polystyrene (EPS): Lighter and more buoyant, often used in epoxy boards. Responsive and eco-friendlier than PU.

Design and Functionality
The design of your surfboard encompasses its shape, contour, and overall architecture, which are all tailored to optimize certain types of waves and surfing styles.
The functionality of your board is a result of its design features, including the:
- Rocker: the curvature from nose to tail, affecting how the board maneuvers on waves.
- Rails: the edges of the board, which play a role in carving and turning.
- Fins: crucial for stability and direction, available in various setups for different surfing experiences.
Understanding these aspects is essential for maintaining your surfboard effectively.
Use surf wax on the top deck to enhance grip under your feet, but remember that surfwax buildup needs to be managed. Regular cleaning preserves the foam core’s integrity and the surfboard’s performance.
Preparing for Cleaning

Before diving into the actual cleaning process, it’s essential to properly prepare.
This includes organizing your cleaning materials and setting up your work area.
Gathering Necessary Supplies
To start cleaning your surfboard, you’ll need to collect these supplies:
- A plastic credit card or a wax comb for wax removal
- Warm water to assist in cleaning and dissolving wax
- A clean rag and cloth for wiping and drying the surfboard
- Surfboard cleaner or a solvent such as turpentine or white spirit
- A towel for drying the board after washing
Optional, but recommended:
- Rubber gloves to protect your hands
- WD40 for easing the removal of tougher wax residue
- Coconut oil for added sheen and protective coating
Setting Up the Cleaning Area
Find a spacious and flat area to lay down your surfboard. Ensure that the space is well-ventilated if you’re using solvents.
You might want to lay a large towel beneath the board to absorb water and prevent slipping.
If working outdoors, consider the weather conditions and avoid direct sunlight, which can soften the wax too much and make it harder to remove cleanly.
Wax Removal Process

Removing old wax from your surfboard is essential for maintaining the board’s grip and performance.
The process involves two key steps: softening the wax and scraping it off.
Softening the Wax
To effectively remove surfwax, you first need to soften it.
There are several methods you can use:
- Sunlight: Lay your surfboard out in direct sunlight for approximately 10-15 minutes, which will naturally melt the wax.
- Hot Water: Pour hot water over the wax to soften it, taking care not to use boiling water which can damage the surfboard.
- Hairdryer: Use a hairdryer on a low setting, directing hot air onto the wax until it begins to melt.
Scraping the Wax Off
Once the surfwax is soft, you can begin to scrape it off:
- Wax Comb: Using a wax comb, gently scrape the old wax off the surfboard. Hold the comb at a 45-degree angle for optimal results.
- Card or Scraper: If you don’t have a wax comb, a sturdy plastic card or a dedicated wax scraper can be used in a similar fashion.
During the scraping process, be sure to remove all the old wax, as leftover residue can affect your board’s performance.
After scraping, if there’s stubborn wax remaining, you can repeat the softening process and scrape again. Regular wax removal ensures your surfboard remains in optimal condition for your next session.
Deep Cleaning the Surfboard

Deep cleaning your surfboard is vital to maintain its performance and longevity.
This involves using the right cleaners and techniques to remove built-up wax, dirt, and salt residue.
Applying the Cleaner
To start the deep cleaning process, first ensure that your surfboard is in a shaded area away from direct sunlight.
Boldly apply a specifically designed surfboard cleaner or a mild solvent that won’t damage the board’s surface.
Diligently spread the cleaner:
- Step 1: Use a clean rag or cloth to apply the surfboard cleaner evenly.
- Step 2: Allow the cleaner to sit for the recommended amount of time to break down the wax and grime.
Rinsing Thoroughly
Rinsing is crucial to prevent any chemical damage and remove all the dissolved residue:
- Step 1: Rinse your surfboard with a generous flow of freshwater to wash away all the cleaning solvents.
- Step 2: Make sure that no areas with cleaner remain on the board, paying particular attention to crevices and contours.
Maintaining Your Surfboard

To keep your surfboard in prime condition, a balance of regular care and timely repair is crucial.
This ensures optimal performance and extends the lifespan of your board.
Regular Care
Your surfboard demands consistent maintenance to perform at its best.
After each session in the water, rinse your board with fresh water to remove salt and sand that can degrade the finish and potentially harm the structure over time.
Make it a habit to check for any areas where wax may need to be reapplied or smoothed out. Here’s a simple breakdown of tasks:
Daily Maintenance:
- Rinse with fresh water
- Check for wax condition
- Store away from direct sunlight
Weekly Maintenance:
- Inspect for dings or cracks
- Clean the deck with a mild, surfboard-friendly detergent
- Apply or remove wax as necessary
Repair and Restoration
Even with meticulous care, your surfboard might get damaged.
Responding quickly to repair needs prevents minor issues from becoming major problems.
For small dings, you can use a repair kit specifically designed for surfboard materials.
Follow these steps:
- Remove any damaged material and clean the area.
- Apply the repair solution as directed.
- Allow it to cure completely before sanding to finish.
For more extensive damage, consult a professional for surfboard repair services to ensure a precise and durable restoration.
Remember, repairing your board properly can greatly enhance its performance and longevity.
Applying a Fresh Coat of Wax

Before applying a fresh coat of wax to your surfboard, ensure that you are working with a clean base. The new wax will adhere better and achieve a more even application, enhancing your grip when surfing.
Choosing the Right Wax
Selecting the appropriate wax for your surfboard is crucial for optimal performance. Surf wax comes in different formulas designed to work in various water temperatures.
- Tropical: For water temperatures above 75°F (24°C)
- Warm: Ideal for water between 64°F to 74°F (18°C to 23°C)
- Cool: Suitable for cooler waters ranging from 58°F to 68°F (14°C to 20°C)
- Cold: Best for temperatures below 60°F (15°C)
Wax Application Techniques
When applying wax to your surfboard, the objective is to create a texture that provides traction.
Here’s how to apply surf wax effectively:
- Base Coat: Begin by applying a thin layer of a harder basecoat wax, typically a paraffin wax, which will help the topcoat adhere and last longer. Wax in a crisscross pattern.
- Top Coat: Choose a surf wax that matches the current water temperature. Apply it in small circles or a diagonal crisscross pattern over the base coat until bumps form.
Remember to wax the areas where your feet will be placed along with the rails where your hands might grip when duck diving or popping up.
Storing Your Surfboard Correctly
Proper storage of your surfboard is crucial to maintain its condition and functionality.
You need to consider the ideal storage conditions and make use of surfboard racks for optimal care.
Ideal Storage Conditions
Your surfboard should be stored in a cool, dry place, out of direct sunlight to prevent delamination and discoloration of the board.
Drying your board completely before storage is essential as trapped moisture can lead to damage. Keep your surfboard in a board bag to protect against scratches and dust.
Ensure the area is free of sharp objects that could dent or gouge the surfboard’s surface.
- Temperature: Keep it cool, avoid extreme temperatures.
- Moisture: Dry thoroughly before storing.
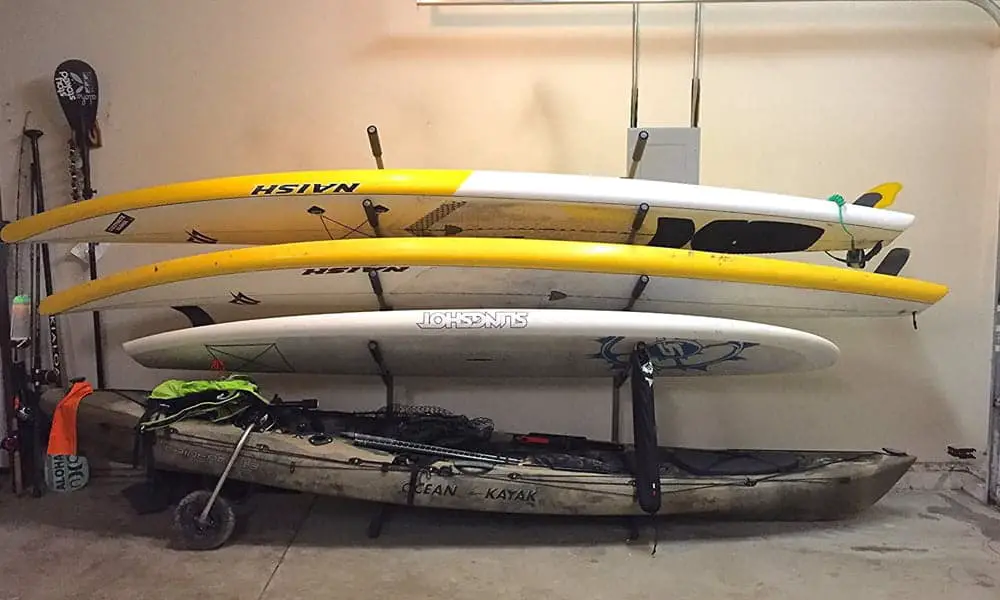
Use of Surfboard Racks
Using a surfboard rack provides the dual benefits of secure storage and easy access.
A surfboard rack should keep the board off the ground, reducing the risk of dings or warping.
When positioning your board on a rack, distribute its weight evenly and rest it on its side or rails to maintain the board’s shape.
Here are some key points:
- Functionality: The rack should support the entire length of your board evenly.
- Accessibility: Place it at a height that is easy for you to reach without straining.
FAQs about How to Clean a Surfboard

What is the best method for wax removal from my surfboard?
To remove wax effectively, start by using a wax comb or a plastic scraper to gently peel off the top layers of wax. For stubborn areas, you can soften the wax with a hair dryer on a low setting, but keep it at a safe distance to avoid damage to the board. After scraping, wipe the surface with a soft cloth and use a specialized surf wax remover or coconut oil to clean any residue.
Can I clean my surfboard with items found at home?
Yes, you can. Use a soft brush or cloth for general cleaning, and consider homemade solutions like a mix of gentle soap and water to cleanse the board. For wax removal, household items like coconut oil can help dissolve the wax.
How should I dry my surfboard after cleaning it?
After washing your board, rinse it thoroughly with fresh water. Then, use a clean towel to dry it completely before storing. Avoid leaving it in direct sunlight to prevent damage.
Is it safe to wash my wetsuit with my surfboard?
Wetsuits require different care. It’s best not to wash your wetsuit with your board. Clean your wetsuit separately using wetsuit shampoo and rinse it with fresh water.
Can using a hair dryer damage my surfboard?
If you choose to use a hair dryer to soften wax, be cautious. Keep the hair dryer on a low heat setting and maintain a safe distance to prevent the board from overheating, which could cause damage.