
There are plenty of options if you’re looking to buy surf wax, but buying a product is hardly the only way to give your board a clean layer of wax. Many new surfers might be surprised to learn how to make surf wax: they don’t know that it’s extremely easy to make your own organic wax and that homemade wax is often just as effective as other products you can purchase for a much higher cost.
Making homemade surfboard wax doesn’t require too much set-up as well, and you can usually make basecoat wax with stuff that’s easy to find in a grocery or hardware store. If you want to give your board a smoother ride and a slicker look, here’s exactly what you need to make surf wax, and all the steps you need to follow in order to give your surfboard a clean and even layer of organic surf wax.
What Do You Need?
Surf wax recipes can vary massively, but for the most part, the key ingredients you’ll want to use are going to be the same in any recipe.
- First, you’ll need one part coconut oil or any fragrant oil, which will give your surf wax a better scent and consistency during mixing.
- After that, you’ll need a little over three parts as much beeswax, which will give your wax solidity while cooling, so that you can keep it as a smooth bar that’s easy to apply to your board.
- Lastly, if you intend on going surfing in cold water, you’ll want an additional main ingredient of either one part pine resin or one part pine tree sap. This is the most important and obscure ingredient, but this will help it remain stronger when hit with colder liquid. It’s technically optional if you want to go for a simpler board surfwax, or if you only surf in warmer temperature or hot water temp, but if you choose to add pine tree sap or pine tree resin, you’ll want one part, the same amount as your coconut oil and wax combination.
- As for tools, you’ll need a stove with a few pots or bowls and also a mold to pour it in while it cools. This can be anything from a typical soap or baking molds, such as the Walfos Silicone Molds, or any small Tupperware you have laying around. If you wish to add in an additional bit of flair, traditional food coloring works perfectly as a way to spice up your base wax with some custom color.

Step 1: Mix Your Ingredients
As mentioned earlier, this recipe is extremely easy to follow and hardly difficult to do, as you’re mostly melting and combining your ingredients to create one smooth liquid. Once you have your one part coconut oil, one part tree sap or resin, and three parts beeswax, you’ll have essentially everything you need and can start putting the melted wax in a bowl together.
You can also add in your optional ingredients here, such as food coloring if you want to give it a brighter look. Alternately, you can also mix coconut oil with an old candle if you want something with a pleasant scent, or a beeswax candle, as the wax from a scented candle will mix into these other ingredients with no trouble.
Step 2: Melt In A Bowl Or Pot Above Boiling Water

One of the biggest mistakes you can make is putting your ingredients directly over a flame, as this will cause them to melt too quickly and potentially burn your pots. Instead, you’ll want to put them in their own pot or bowl and put them on top of another pot over an element filled with water, as this will let the steam from below heat your surf wax much more evenly.
From here, you just need to stir your mixture while it melts to make sure all your ingredients are evenly combined, which shouldn’t take more than about five to ten minutes. You’ll know it’s done once it has the consistency of thick syrup, and so long as it all looks like it’s reached the same color and transparency, you can usually take it off the heat and move on to the final step.
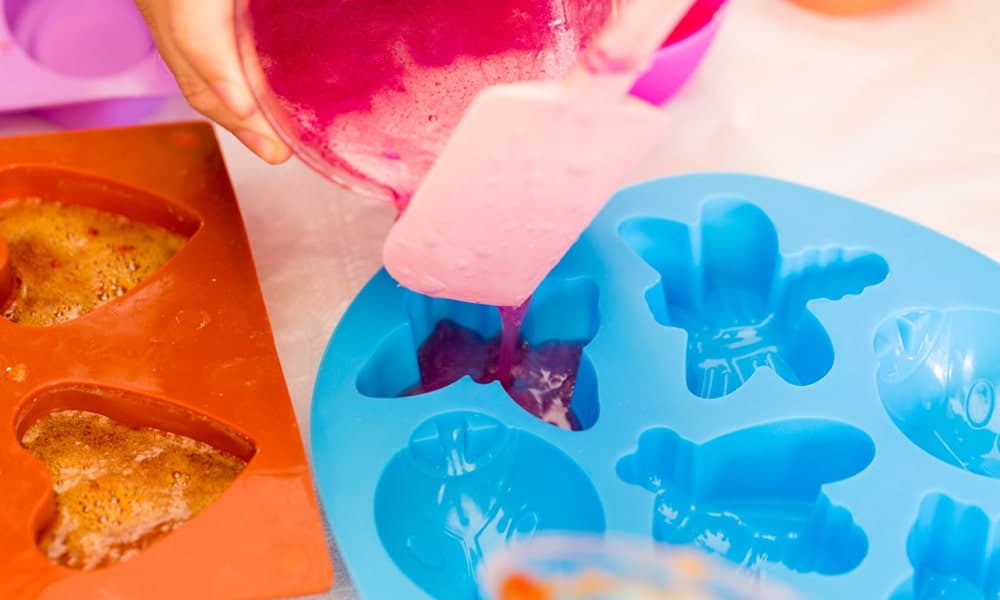
Step 3: Pour Into Molds And Cool
The final step you need is to simply pour the surf wax into your molds which, again, can be anything from tupperware to specially-designed soap bar molds. The specific shape of your wax doesn’t matter too much, but it should be something you could easily hold and rub across your board as a basecoat. Keep it about the size of your hand and avoid making it too sharp or pointy so it’s easy to hold.
Once the mixture is poured into any mold, simply put it in any place outside of direct sunlight to let cool. Once it’s completely cool and solid, you can remove it from its container and keep it wherever you normally keep surf wax at home or on the go. You won’t need to refrigerate the surf wax either, as it should stay consistently solid, the same way as any candle or bar of soap.
Final Thoughts on home made surf wax
With this recipe, you have your own homemade cold water surf wax that should last you quite a long time. Just make sure not to leave it out in the heat too long and avoid using mixes with tree resin or sap in warm water if you aren’t surfing in exceptionally hot temperatures. Otherwise, you’ll be able to give your board just the right amount of shine and grip you need at a fraction of the cost.
If you do choose to go with a specific product, though, there is no shame in purchasing pre-made surfing wax available widely online or in any surf shop, and there are tons of great options. Sticky Bumps Original Surf Wax comes in packs of a dozen and are suited for all kinds of water temperatures, but you can also go with any brand you’re comfortable with.