
Yes, you can definitely paint a surfboard! It’s a great way to personalize your board, express your creativity, and even improve its durability. However, there are a few things to keep in mind we will cover in this gude. So make sure you go through every step.
Surfboards are not just a means of transportation on water, but they are also an extension of the surfer’s personality.
From the design to the color, surfers take pride in customizing their boards to fit their style. One way to add a personal touch to a surfboard is by painting it.
However, when it comes to surfboards, the question arises: can you paint a surfboard?
Surfboards are made of foam and covered with a soft outer layer, which can make painting them a bit tricky.
Some paints can dissolve the foam, while others may not adhere to the surface properly. Furthermore, the is designed to bend and flex, which can cause the paint to crack or peel. So, is it possible to paint a surfboard without damaging it?
In this article, we will explore the topic of painting surfboards. We will look at the different types of paints that are safe to use on surfboards and provide tips on how to properly prepare the board before painting.
We will also discuss the pros and cons of painting a surfboard and answer the question of whether or not you can paint a surfboard without damaging it.
Can You Paint a Surfboard?
If you’re wondering whether you can paint a surfboard, the answer is yes, you can.
However, it’s important to note that some paints can dissolve the foam of the board if they penetrate the outer layer.
Therefore, it’s essential to choose the right type of paint and follow the correct steps to avoid any damage to your board.
Types of Surfboards
There are various types of surfboards, and the type of board you have will determine the type of paint you can use.
For example, if your board has an EVA foam deck, you can use acrylic spray paint or water-based paint.
However, if your board has a polyethylene foam deck, you’ll need to use a paint that’s specifically designed for polyethylene foam.
Preparation Steps Before Painting
Before you start painting your surfboard, you’ll need to follow these preparation steps:
- Clean your board with surfboard cleaner and a clean cloth to remove any dirt or residue.
- Remove any stickers or decals from the board.
- Use painters tape to cover any areas of the board that you don’t want to paint.
- Lightly sand the surface of the board with 220 grit sandpaper to create a rough surface that will help the paint adhere better.
- Wipe the board down with acetone to remove any remaining wax or residue.
Now let’s get into more details. Proper preparation of your surfboard is essential for a quality paint job that lasts. You will need to thoroughly clean the surface, sand it down, and ensure that areas you don’t want painted are protected.
Cleaning the Surface
First, remove all wax from the board using a wax scraper. For residual wax, applying a little warm water can help loosen it.
Once the wax is removed, clean the surface with acetone or a similar solvent, wearing gloves to protect your hands. Make sure the surfboard is completely clean and dry before you move on to sanding.
Sanding the Surface
Start sanding the surfboard with coarse sandpaper and then move to a finer grit to smooth out the surface. If you have access to an electric sander, it can make the process quicker and more even, but hand sanding with sandpaper around 320 grit works well, too.
It’s important to sand the fiberglass evenly to ensure the paint adheres properly. After sanding, the board should be left to dry for 24 hours to ensure any moisture caught during the sanding process has evaporated.
Taping and Covering
Finally, apply masking tape or painter’s tape to the rails, any logos, or parts of the surfboard you don’t wish to paint.
You can also use tape to create patterns or designs if you like. If you’re using stencils, make sure they’re securely taped down. Cover areas that are not to be painted with newspaper or plastic sheets to protect them from overspray or accidental brushstrokes.
Painting the Surfboard (Choosing Your Paints and Materials)

Once you’ve prepared your board, you can start painting it.
Here are the steps to follow:
- Apply a light coat of paint to the board, starting at the center and working your way outwards.
- Allow the paint to dry completely before applying a second coat.
- Apply additional coats of paint until you achieve the desired color and coverage.
- Allow the paint to dry completely before removing the painters tape.
Selecting the right type of paints and materials is crucial for a successful surfboard painting project. Your choice will affect not only the appearance but also the longevity of your artwork.
Selecting Paint Types
When it comes to choosing paint for your surfboard, acrylic paint and Posca paint pens are popular choices. Acrylic paints adhere well to the surfboard surface and come in a wide range of colors.
For detailed work, Posca pens, which are water-based paint pens, offer fine control and are easy to use.
- Acrylic Paint: Apply with a paintbrush or sponge for larger areas.
- Paint Pens: Use for detailed designs or writing; Posca paint pens are highly recommended.
If you prefer a spray finish, acrylic spray paint is suitable for achieving an even coat over larger areas.
Remember to apply:
- Primer: To ensure better paint adhesion.
- Spray Paint: Use multiple light coats instead of a single heavy one.
Gathering Additional Materials
In addition to your primary paints, gathering the right materials will ensure a smooth painting process.
Before you start painting:
- Nail Polish Remover or Acetone: For cleaning the surfboard surface.
- Sandpaper: To create a smooth surface for painting.
During the painting:
- Stencils or Cardboard: For precise shapes or patterns.
- Painter’s Tape or Masking Tape: To block off areas you don’t want painted.
For your safety:
- Face Mask: To avoid inhaling fumes, especially when using spray paint.
Consider the following list for a complete set-up:
| Material | Purpose |
|---|---|
| Acrylic Paint/Spray Paint | Main coloring agent |
| Posca Paint Pens | Detailed artwork |
| Primer | Prepares the surfboard surface |
| Sandpaper | Smoothens the board before painting |
| Nail Polish Remover/Acetone | Cleans the surface |
| Stencils/Cardboard | Helps create designs |
| Masking Tape | Keeps paint within boundaries |
| Paintbrush | Applies paint |
| Face Mask | Safety equipment against fumes |
As a final summary, before you start painting your surfboard, you’ll need to gather the following materials needed to paint a surfboard:
- Acetone
- Surfboard cleaner
- Paintbrushes
- Painters tape
- Sandpaper (220 grit)
- Acrylic spray paint or water-based paint
Applying Paint and Design
Before adding color and patterns to your board, you must ensure your design is well-planned and the surface properly prepped.
This section will guide you through creating a design and then executing the paint job with precision and care.
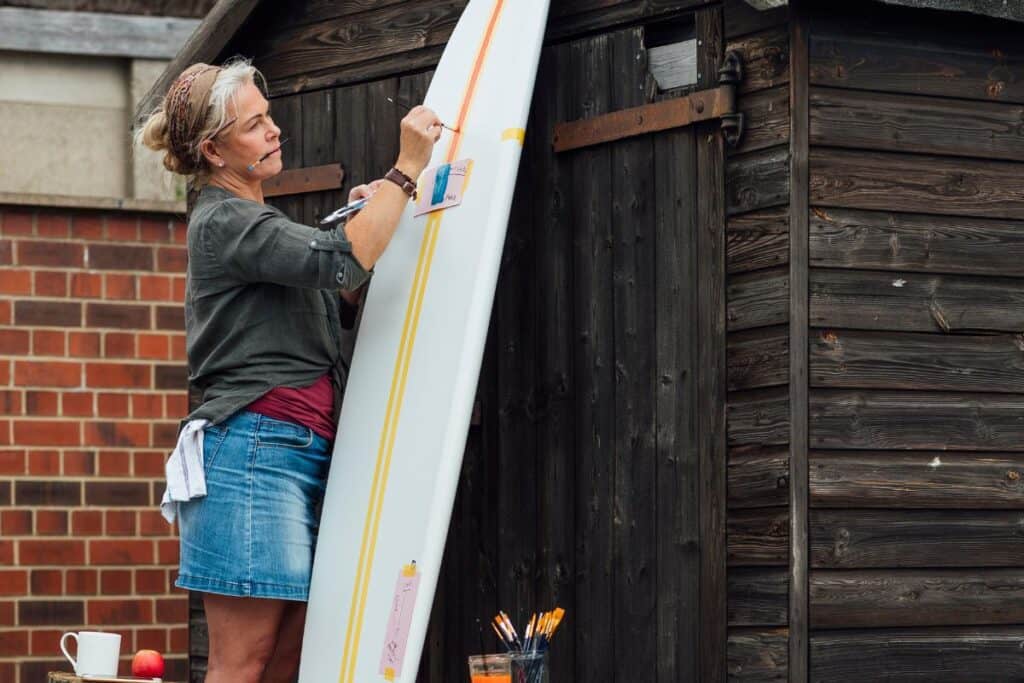
Creating the Design
To start, select a design that complements your board’s shape and reflects your personal style. Begin by sketching your ideas on paper; consider elements like detail and shadowing that can add depth to your artwork.
Once satisfied with the sketch, transfer the design onto your surfboard using a pencil for light-colored boards or a whiteboard marker or chalk on darker surfaces. For complex designs, stencils are invaluable for achieving sharp outlines without errors.
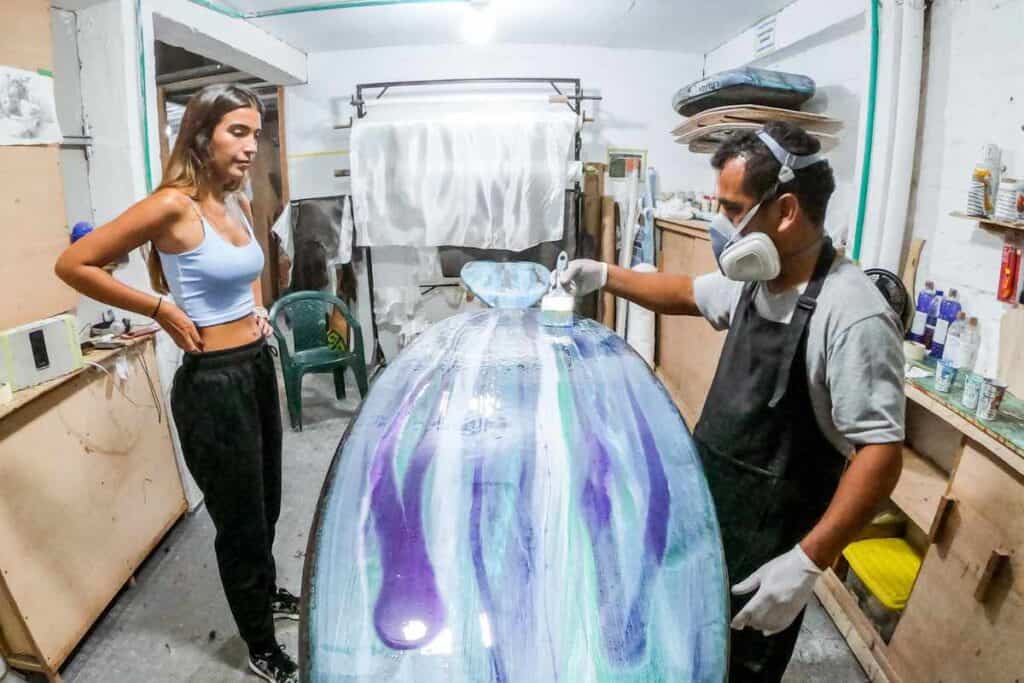
Executing the Paint Job
The paint job begins with ensuring your surfboard’s surface is clean and smooth. Any remaining wax, oils, or debris can prevent paint from adhering properly. Use masking tape to section off areas that you don’t want to be painted, ensuring crisp lines.
Depending upon your design, you might use spray paint, paint pens, or brushes. When applying spray paint, work in a well-ventilated area, applying thin, even layers and allowing each to dry before adding the next.
For detail work, paint pens offer more control and precision. After the paint has dried, a clear coat spray can be applied to protect your design from the elements. This clear coat not only seals in your artwork but also provides a smooth finish for better glide on the water.
Finishing Touches

Once your surfboard’s design has been painted on, the focus shifts to the final steps that will protect your artwork and ensure longevity.
These finishing touches will enhance the durability of your paint job and give your surfboard either a glossy or matte appearance depending on your preference.
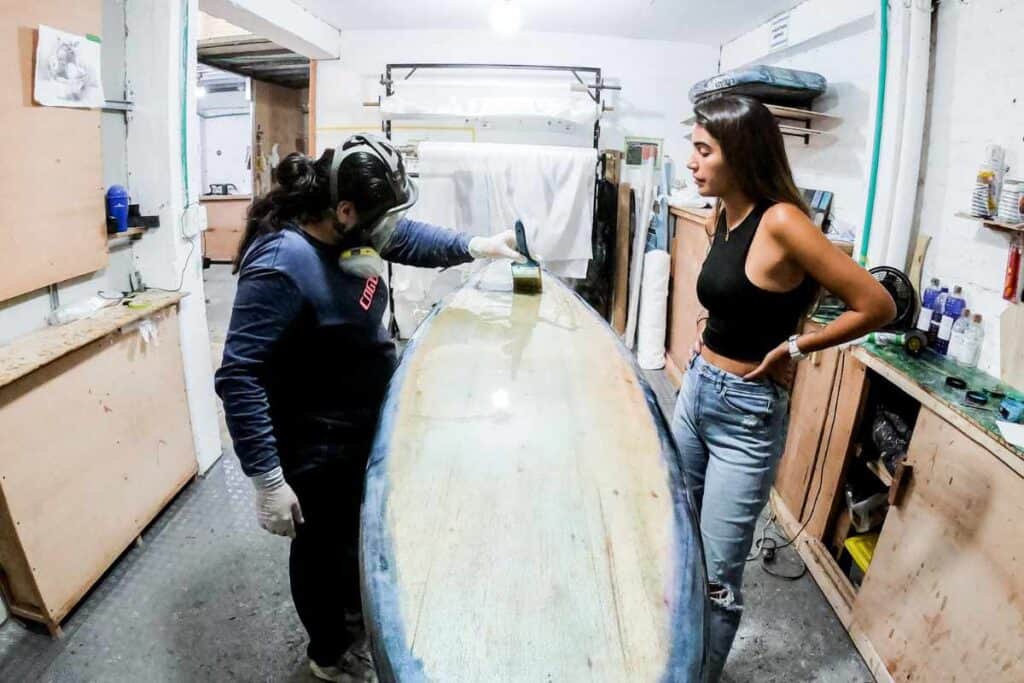
Applying Clear Coat
To seal in your design and protect the paint, you’ll apply a clear coat finish.
Choose between a glossy surface finish for a shiny look or a matte surface finish for a non-reflective aesthetic.
- Clear Coat Spray: Hold the can approximately 8-12 inches away from the surface and spray an even layer over the painted area of your surfboard. Ensure full coverage by overlapping strokes.
- Layering: Apply multiple thin layers rather than one thick layer to avoid drips and uneven texture.
Complete Drying and Curing
After the clear coat application, you must allow proper drying and curing time to ensure the best finish.
- Dry for 24 Hours: Leave the surfboard in a well-ventilated area, away from direct sunlight to dry.
- Curing Time: The clear coat may need several days to fully cure, depending on product specifications and environmental conditions.
Removing Masks and Tapes
Careful removal of masks and tapes is crucial to prevent peeling of the new paint job.
- Peeling Tape: Gently remove masking tape and any other protective materials. If you notice any excess paint on the tape, cut it away with a sharp blade before peeling it off to maintain sharp lines.
- Clean-Up: Check for any residue or excess paint, and clean it off with the appropriate solvent, taking care not to mar the fresh paint and clear coat.
Caring for Your Painted Surfboard
After you’ve painted your surfboard, it’s essential to take proper care of it to ensure the paint lasts as long as possible.
Here are some tips:
- Avoid exposing your board to direct sunlight for extended periods, as this can cause the paint to fade.
- Keep your board clean and free of dirt and debris.
- Store your board in a cool, dry place when not in use.
- Avoid dragging your board across rough surfaces, as this can scratch the paint.
Can You Put Stickers on a Surfboard?
Yes, you can put stickers on a surfboard, but it may not be the best idea. Surfboards are made of foam, which can make it difficult for stickers to adhere properly.
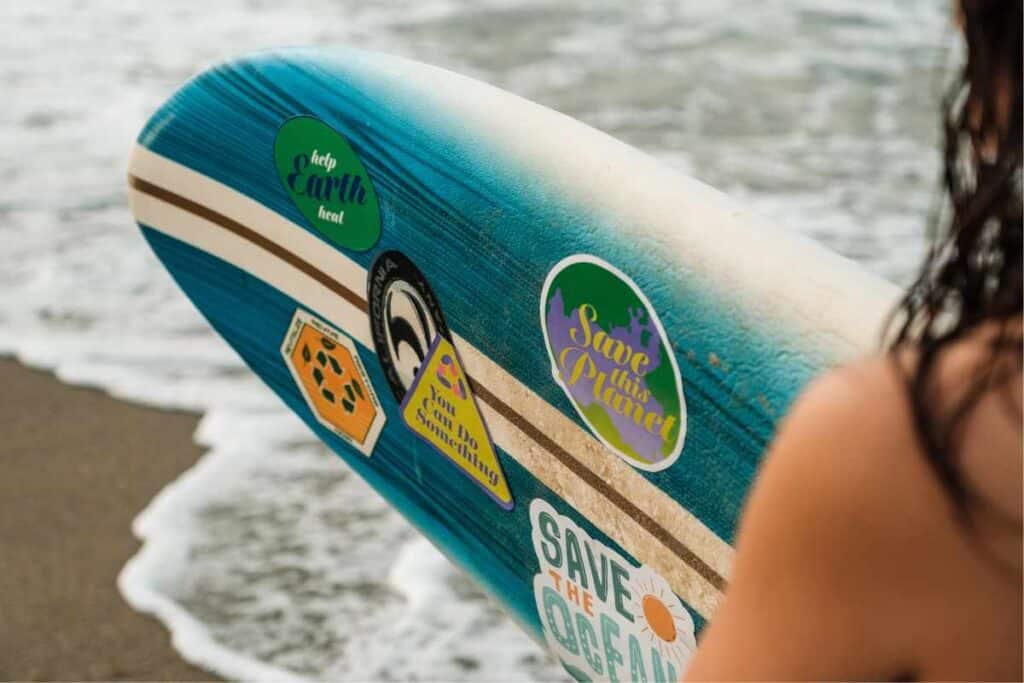
Additionally, stickers may not last as long on a surfboard as they would on a traditional surfboard.
If you do decide to put stickers on your surfboard, there are a few things you can do to help them stick better.
- First, make sure the surface of the board is clean and free of any dirt, wax, or other debris. You can use rubbing alcohol or a surfboard cleaner to help remove any residue.
- Next, consider using a sticker adhesive specifically designed for use on foam surfaces. These adhesives are formulated to work better on foam than traditional adhesives and can help your stickers stay in place longer.
- It’s also important to note that if you decide to remove stickers from your surfboard, you should be careful not to damage the foam. Using a solvent like acetone or rubbing alcohol can help remove stickers, but be sure to use them sparingly and avoid getting them on the foam itself.
Final Tips on Can You Paint a Surfboard
Customizing your surfboard with a fresh coat of paint is a definitive way to add personal character to your gear.
Whether you’re aiming to refresh an older board or make a new one stand out, painting your surfboard is not only possible but also an exciting way to express your style. The process requires careful preparation and the right materials to ensure that the paint adheres properly and withstands the wear and tear of the waves.
Before you begin the transformation, understanding the procedure is crucial. You have the option to paint directly on the finished board or on the foam beneath. Painting on the finished board is an excellent method for concealing any dents or previous repairs.
On the other hand, applying paint directly to the foam before it’s sealed with fiberglass gives your artwork an added layer of protection, ensuring longevity. To achieve a professional-looking paint job, you’ll need to thoroughly clean the board, remove any wax, and apply paints specifically formulated for surfboard use.
An essential part of surfboard painting is meticulous preparation. To ensure that the paint bonds properly, you’ll need to start with a clean, smooth surface free from wax and debris.
Whether you’re exploring intricate designs or simple color blocks, the key lies in using quality, UV-resistant materials that can handle sun exposure and salt water. The process requires patience and attention to detail, but the result will be a custom surfboard that’s as unique as your surfing style.
Conclusion
In conclusion, painting a surfboard is possible, but it requires careful consideration and preparation. The type of paint used is critical, and it is important to choose a paint that is compatible with the foam material of the board. Some paints can dissolve the foam, which can lead to significant damage to the board.
Before painting a surfboard, it is essential to clean the board thoroughly to ensure that the paint adheres properly. Any wax or residue left on the board can affect the quality of the paint job. It is also important to consider the design and color scheme before painting the board to ensure that the final result is aesthetically pleasing.
Overall, painting a surfboard can be a fun and rewarding project for surfers who want to personalize their boards. However, it is important to proceed with caution and follow the necessary steps to avoid damaging the board. By taking the time to prepare the board properly and using the right materials, surfers can create unique and eye-catching designs that will make their boards stand out in the water.